Considering putting up a fence, but have no idea where to begin? Don’t worry, you’re not alone.
A fence does more than define your space; it enhances privacy, boosts security, increases home value, and adds visual appeal.
Whether you are hoping to provide a secure area for children and pets, keep the noise level down, or enhance the appearance of your yard, choosing the proper fence can make all the difference.
However, with so many materials, styles, and installation types available to select from, finding the best one can be daunting. Each option has its strengths, weaknesses, and maintenance requirements, so it’s best to prepare and conduct your research first.
Intrigued?
In this guide, we’ll break down the most popular fencing materials and styles and explain how to prepare your property for a smooth installation.
Table of Contents
Step 1: Choose the Right Material

Your choice of fencing material will significantly affect the cost, durability, appearance, and maintenance level of your fence. Let’s explore the most common options:
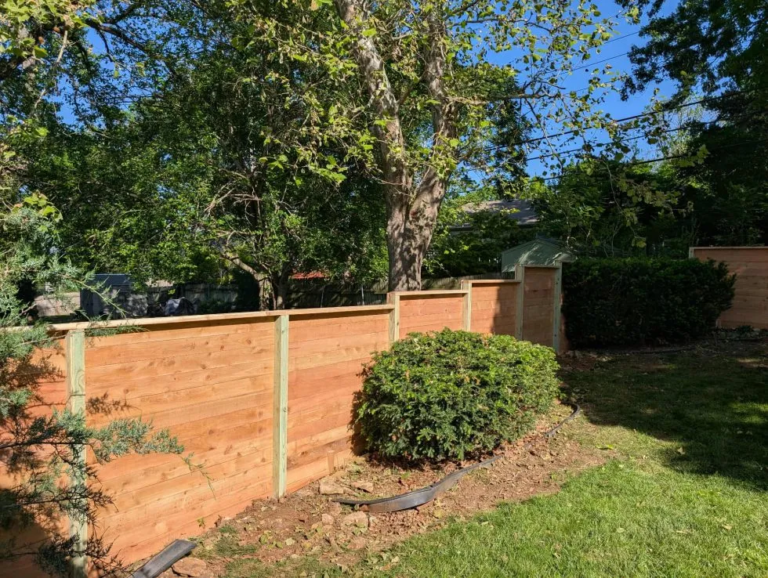
Cedar
Cedar is a popular choice thanks to its warm, natural appearance, pleasant aroma, and built-in resistance to insects and rot. This type of wood also has a natural aspect to it that a user might find attractive. In addition, cedar has excellent sound-dampening qualities and curb appeal.
Although beautiful, cedar requires homeowners to periodically seal or stain the wood to maintain its strength and appearance, which can be very labor-intensive.
While cedar does offer curb appeal, one has to consider the labor-intensive maintenance it requires. So, if you’re considering it for your property, take the time to learn more about cedar fencing—not just how it looks on day one, but also how it performs and ages in your specific climate. Having more information about cedar and its performance in specific climates can help you make an informed decision.
Pressure-Treated Wood
This is a more affordable alternative to cedar, as it is treated with chemicals to prevent rot and pest damage. However, it lacks the warm tone of cedar and may crack over time.
Vinyl
While lacking the beauty of wood, vinyl fences offer a sleek, contemporary appearance and require almost no maintenance. They are a good option for those seeking low maintenance option over the long run.
Composite
Composite fencing is manufactured from a combination of wood fibers and plastic, providing a wooden appearance while being more durable. Although it is more expensive, composite fencing is resistant to fading, warping, and insects.
Chain-Link and Metal
Chain-link and metal fences (wrought iron and aluminum) offer good security without blocking the views. They are very durable but are mostly not accepted due to privacy concerns.
Step 2: Understand Local Regulations
Familiarize yourself with the existing legal framework before beginning any construction. Visit your local municipality and homeowners’ association for bylaws, permits, height restrictions, and zoning laws. In some cases, you may also need to arrange a utility locate service to mark any relevant underground lines.
Some areas have environmental or historical guidelines, especially in cases where you are near protected land or conservation zones.
Ignoring these policies could subject you to fines or the costly and frustrating process of having to reconstruct your fence.
Step 3: Plan and Design Thoughtfully
Next, outline the layout of your fence. Mark the property lines clearly, and if unsure, get a survey done. When considering factors such as slope, existing trees, or structures that may impact your fence line, measure the entire perimeter.
Key elements to consider:
- Height: Choose based on your purpose (privacy, containment, aesthetics).
- Style: Picket, lattice, horizontal slats, shadowbox, etc.
- Gate Placement: Decide how many gates you need and where they should go for convenience and accessibility.
A good design balances function and form. For instance, a cedar fence with horizontal slats may add a modern look while still providing adequate privacy.
Step 4: Prepare the Site
Completing the work thoroughly ensures durability for your fence. First, clear the site of any overgrown vegetation, old fencing, rocks, and other barriers. Next, mark out where your posts will go using stakes. Employ a string line to ensure straight lines and even spacing.
If your line crosses over rough, uneven stretches of land, determine if you will step the panels or contour them to fit the slope. Leaving the panels unsymmetrically balanced could create gaps at the bottom or an unrefined look.
Step 5: Install With Care (Or Hire a Pro)
Putting up a fence may seem like a simple DIY project. Still, in reality, it is much more challenging than it sounds, especially with cedar, which requires accurate placement to prevent rapid deterioration.
DIY Route
If you have some experience with tools and spare time on hand, self-installation will significantly reduce labor costs. A post hole digger, level, concrete, power drill, and saws are some pieces of equipment you will require. When performing the task, be sure to follow the manufacturer’s or supplier’s instructions, particularly regarding wood spacing and sealing.
Hiring a Professional
For the average homeowner, an installation done by a professional is often preferred, as it offers both peace of mind and long-term dependability. Contractors will properly level the fence and ensure it is secure and compliant with existing codes. Especially in case of cedar fencing, working with professionals allows you to take advantage of proper treatment, sealing, and wood selection, which are essential in maintaining and prolonging cedar’s charm and lifespan.
Step 6: Maintain for Longevity
No matter the material, every fence needs some level of upkeep. For cedar, regular staining or sealing every 1–3 years is crucial to protect it from UV damage and moisture. Cleaning the fence annually with a mild detergent can prevent mold and mildew buildup.
Inspect posts and panels periodically for signs of wear, warping, or rot, especially after extreme weather. Addressing small issues early on prevents costly repairs later.
Vinyl, metal, and composite fences require less maintenance, but occasional cleaning and inspection are still recommended.
Conclusion
Now that you know the steps, it’s your turn to plan and install the perfect fence for your property.
Whether you choose cedar for its natural beauty or vinyl for its low maintenance, making informed decisions ensures lasting results. Don’t forget to factor in regulations, design, and upkeep.
A well-installed fence adds value, privacy, and peace of mind, so go ahead and create your dream outdoor space today!


