Want a paint job that lasts?
There’s so much for homeowners to think about when painting the exterior of their house. Colour choices, textures, material costs…it can all become quite overwhelming.
And that’s before rolling a single bucket of paint onto the siding.
One thing most people will agonise over while selecting paints is completely forgotten by the time they start. But it’s the one thing that will make or break whether a paint job only lasts a few months or upwards of a decade.
Prep work.
Go into a paint project without properly preparing the surface and even the most high-quality paints will blister, crack, and peel within a few seasons. It’s not an exaggeration — that’s just what happens when paint is applied to a dirty, flawed surface.
The good news is…
Paint prepping isn’t hard. Not at all. But it does require taking the proper steps and having a little patience.
Here’s what every homeowner should know about prepping the exterior of their home for paint.
Table of Contents
Why Prep Work Is the Foundation of Every Paint Job
Let’s get something straight…
Prep work makes up at least 60% of exterior painting labour costs — and there’s a very good reason why. When corners are cut during the prep process, there’s room left for those paint coats to fail.
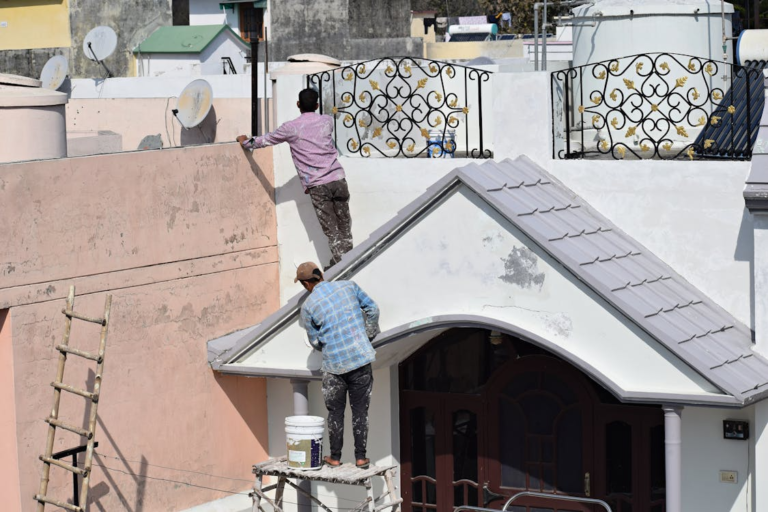
The best exterior painting contractors spend more time prepping a home than they do actually painting it. Whether it’s a complete repaint or just some touch ups, they begin with the same process. Talk to any reputable house painters in Grand Rapids and the same message comes through — quality prep work is mandatory before painting can begin.
The result? A paint job that looks great, lasts longer, and protects the home from moisture, rot, and weather damage for years.
Step 1: Inspect the Entire Surface
The first order of business is a thorough inspection of every inch of exterior siding.
Walk around the house and closely inspect every nook and cranny — take time here. Looking for:
- Peeling or flaking paint
- Cracks or gaps around windows, doors, and trim boards
- Rotting or damaged wood siding
- Mould, mildew, or dark staining
- Rust bleeding from nails or metal fixtures
Finding these problems before the painting process begins is the difference between a fantastic paint job and failure two years down the road. Painting over defects doesn’t fix them — it seals them in and can actually speed up the deterioration process.
Step 2: Pressure Wash Everything
Once the inspection is done, it’s time to clean the exterior of the house.
Dirt, dust, mildew, old paint residue, and all the grime that collects on exterior siding needs to come off before painting begins. Otherwise, poor adhesion becomes the end result — which is pretty much asking for a peeling paint job.
Ideally, a pressure washer set at 1,500 to 2,500 PSI works well for most surface types. Too much pressure on wood or vinyl can cause damage, so don’t overdo it. Just make sure to rinse thoroughly.
Oh, and one more thing…
Once the surface has been washed, allow it to dry completely before proceeding. Painting on a damp surface will cause blistering. Typically this means 24-48 drying hours depending on temperature and humidity.
Step 3: Scrape and Sand
Time to start working!
All loose paint needs to be scraped away. Use a quality paint scraper and go slowly to avoid gouging the surface underneath.
Once all the loose paint has been removed:
- Sand the edges of scraped areas smooth
- Feather edges so there isn’t a visible ridge where old paint ends
- Lightly sand glossy or shiny surfaces to help paint adhere
If a home has been painted several times over the years, this step is crucial. Thick layers of uneven paint are one of the leading causes of premature paint failure.
Step 4: Repair, Fill, and Caulk
Repair any issues found during the inspection before painting.
Wood rot can be cut out and replaced with fresh wood or an exterior-grade epoxy filler. Painting over rotted wood is a waste of time — the job will just need to be done again the following year.
Cracks and gaps around windows, doors, siding joints, and trim should all be sealed with paintable exterior caulk. Moisture is one of the leading causes of early paint failure, so every gap should be sealed.
Nail heads that have popped through the siding or started to rust should be countersunk, primed, and filled. Otherwise rust will bleed through the paint from year one.
Allow time for caulking and fill sealants to cure before moving on.
Step 5: Prime Before Painting
Last but certainly not least…
Priming may not seem like a big deal, but it serves several important purposes.
First, it seals bare wood and porous materials and repaired areas. Next, it allows the topcoat to adhere much better to the surface. It also provides stain-blocking capabilities and creates a uniform base for the topcoat.
At the very least, all bare wood areas, repaired spots, or filled sections should be spot primed before painting. If painting over a heavily weathered surface or going from an oil-based paint to latex — consider priming the entire surface.
Don’t skimp here. Proper priming is what separates a 5-year paint job from one that lasts 10+ years.
Common Prep Mistakes That Kill Paint Jobs Early
Don’t become a statistic…
Despite the best efforts, these are the most common mistakes made when prepping a home for paint.
- Painting too soon after washing — the surface needs time to dry between washing and painting
- Skipping the sanding step — paint doesn’t adhere well to glossy or shiny surfaces
- Using interior caulk outside — exterior caulk is formulated to expand and contract with temperature changes
- Painting in bad weather — most exterior paints won’t adhere when it’s under 50°F or humidity is high
- Rushing the primer — don’t apply the topcoat until primer is fully dry
Paint material costs have risen nationwide by 10% to 30% in recent years, making it more important than ever to get the prep work done correctly the first time. A failed paint job means starting over. And starting over isn’t cheap.
It’s really quite simple:
- Inspect the entire surface and note every problem area
- Pressure wash the entire surface and allow adequate drying time
- Scrape, sand, and smooth the existing paint surface
- Repair damage and apply exterior caulk to every gap
- Prime all bare and repaired areas before painting begins
Skip nothing. Paint jobs don’t fail because of the paint selected. They fail because of skipped steps.
Do these things in order, take the time to do them right, and the exterior paint will be set up for success long after the job is finished.


