

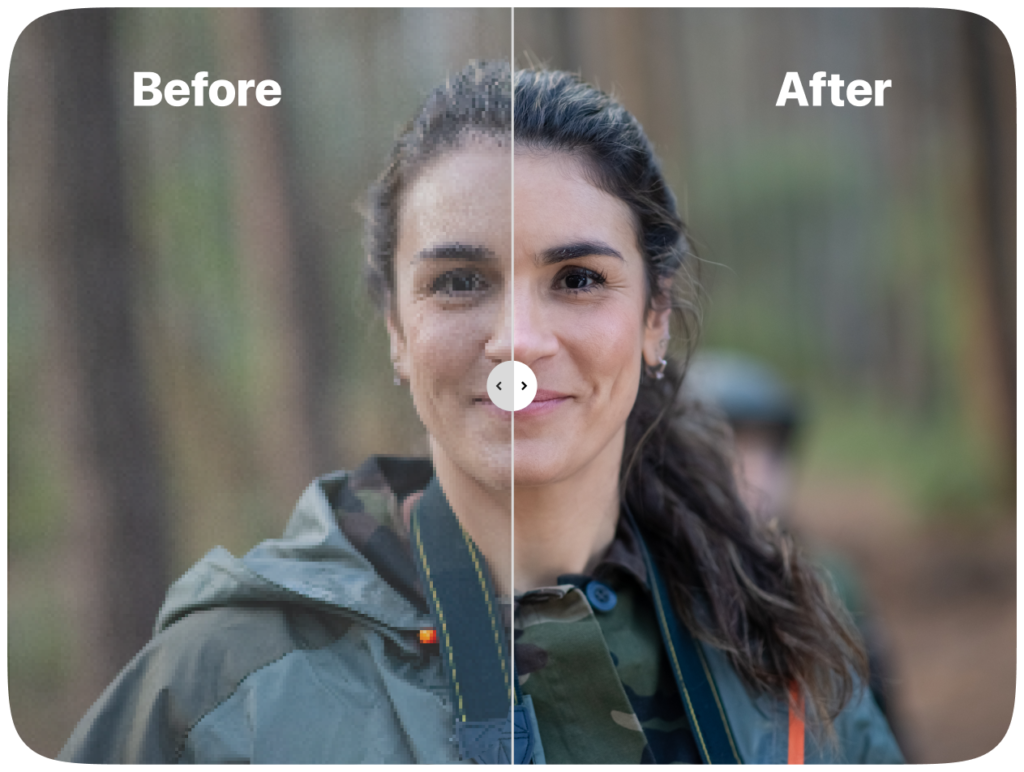
Every creator has been there. You find the perfect photo for a post, maybe an old snapshot, a screenshot, or a picture a friend sent over a messaging app, and it looks fine on your phone until you blow it up. Suddenly it is soft, pixelated, and full of blocky edges. On platforms where people scroll fast and judge in a second, that kind of image rarely gets a second look.
The good news is that you no longer need a professional editor to fix it. Learning how to upscale image files properly can rescue low-resolution photos and give your content a cleaner, sharper look. Here is what actually works, and what to watch out for.
Table of Contents
Why Image Quality Still Matters on Social Platforms
It is tempting to think that audiences only care about the message. In practice, visuals carry a lot of the weight. A blurry thumbnail on YouTube, a grainy carousel slide on Instagram, or a pixelated meme on X can make even good content feel careless.
Platforms also compress what you upload. Instagram, Facebook, and TikTok all shrink and re-encode files to save bandwidth, so an image that starts out weak tends to come out even worse. Starting with a cleaner, higher-resolution file gives you more room before compression starts eating away at detail.
There is also a trust factor. Brands, small businesses, and personal creators who post crisp images simply look more established. Viewers may not consciously notice sharpness, but they notice when something feels off.
What Does It Mean to Upscale an Image?
Upscaling means increasing the pixel dimensions of a picture, for example turning an 800 by 600 file into something two or four times larger. The tricky part is that you cannot create real detail out of nothing. Older methods, like bicubic resizing in basic editors, just stretch existing pixels and blend them together. The result is bigger, but usually blurrier.
AI upscaling works differently. These tools are trained on huge numbers of images, so they learn what edges, skin texture, hair, text, and fabric usually look like. When you feed them a small photo, they predict the missing detail and rebuild it. The output is not a perfect recovery of the original scene, but it often looks far more natural than simple stretching.
Common Situations Where Creators Need Upscaling
Most people do not think about resolution until a specific problem shows up. A few of the most common ones include:
- Old photos: Pictures from early phone cameras or scanned prints that look tiny on modern screens.
- Screenshots and memes: Images that have been saved, shared, and re-saved so many times they have lost most of their clarity.
- Cropped shots: A great moment captured from far away, where zooming in leaves you with very few pixels.
- Thumbnails and banners: Small source images that need to fill a large header or video cover.
- Product photos: Quick snaps taken for an online shop that need to look sharper on listing pages.
In each case, upscaling is less about making a photo huge and more about making it usable.
How to Upscale Image Files with AI Tools
The process is usually simple. Most online tools follow the same basic steps: upload the photo, choose a scale such as 2x or 4x, let the tool process it, then download the result. Browser-based options are handy because there is nothing to install. For example, CapCut offers a free tool to upscale image files online, which fits well if you already edit short videos or social graphics in the same ecosystem.
Other well-known options include Adobe Photoshop’s Super Resolution feature in Camera Raw, Topaz Photo AI for desktop users, and open-source projects like Real-ESRGAN for people comfortable with a bit of technical setup. Each has its own strengths, so it is worth testing a couple with the same photo and comparing the results side by side.
Tips for Getting Better Results
AI upscalers are impressive, but they work best when you give them a fair starting point. A few habits make a noticeable difference:
- Use the best version you have. If you have the original file, use that instead of a compressed copy pulled from a chat app.
- Do not go bigger than you need. A 2x upscale often looks more natural than an 8x one. Match the size to where the image will appear.
- Check faces and text closely. AI can sometimes invent odd details around eyes, teeth, or lettering. Zoom in before you post.
- Edit after upscaling. Adjust brightness, color, and cropping once the image is larger, since you will have more pixels to work with.
- Export in a good format. Save as high-quality JPEG or PNG so you do not undo the improvement with heavy compression.
Limits and Ethics You Should Keep in Mind
Upscaling is a repair tool, not magic. A heavily blurred or extremely tiny image may still look artificial after processing, with a smooth, painted texture that viewers can spot. In those cases, it is sometimes better to find another photo than to force a weak one.
There is also a responsibility side. Upscaling a photo of a real person or event can subtly change details, so be careful when sharing images that people might treat as evidence or news. Always make sure you have the right to use the photo in the first place, especially if it belongs to another photographer or brand. Crediting the original source is still good practice.
Conclusion
Sharp visuals are a small detail that quietly shapes how people react to your posts. When a photo is too small or too blurry, you do not have to give up on it. Modern AI tools make it easy to upscale image quality in a few clicks, whether you are restoring an old memory, fixing a cropped shot, or preparing a thumbnail. Start with the best source file you can find, choose a sensible scale, and always check the result before you hit publish. Used thoughtfully, upscaling can help your content look as good as the ideas behind it, which gives it a much better chance of being noticed.